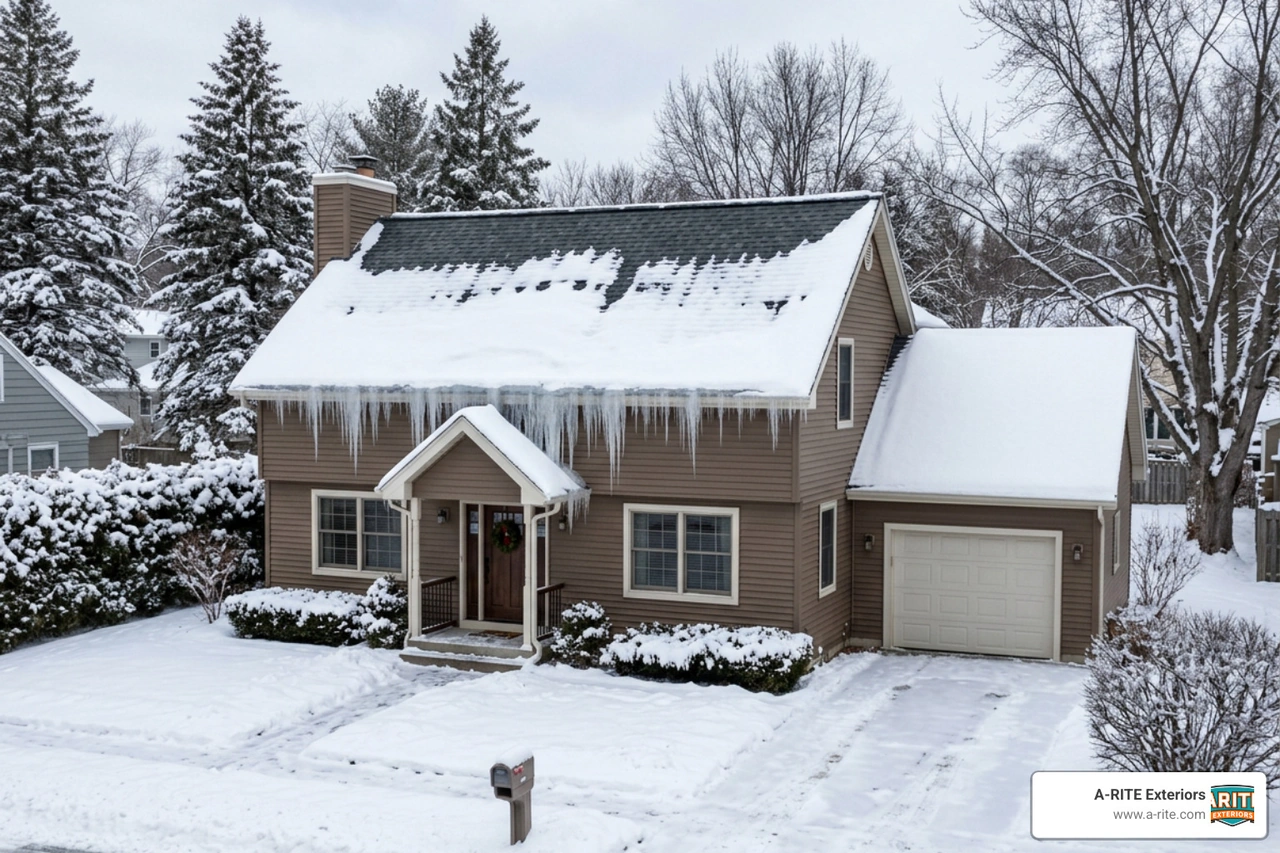
Understanding Ice Dams: How They Form and Why They Damage Wisconsin Homes
Understanding the direct link between attic ventilation and ice dams is the single most important step you can take to protect your Wisconsin home from winter water damage.
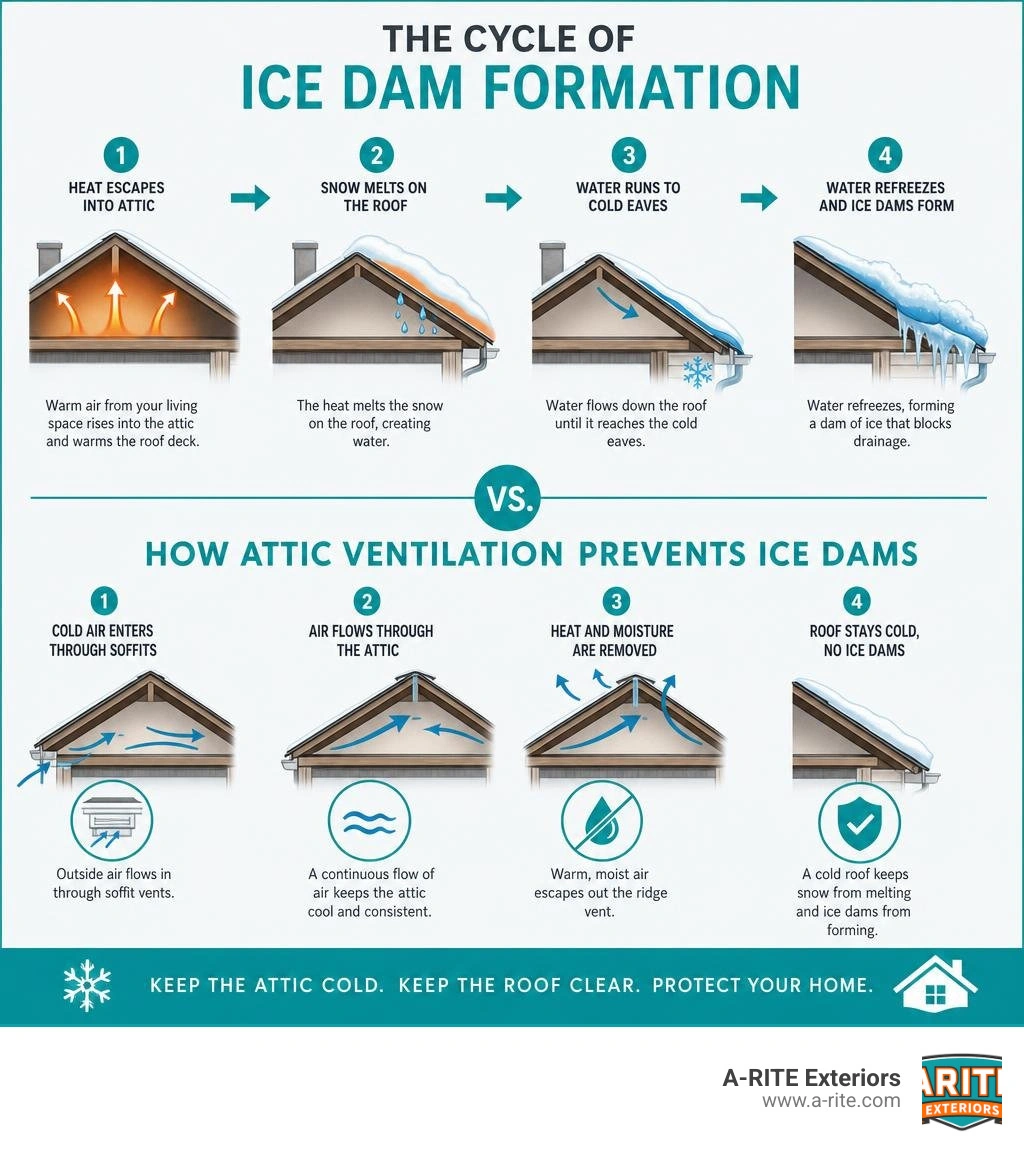
When your attic is not properly ventilated, heat from your living space gets trapped under the roof deck. This heat melts the snow on your roof, which then runs down to the cold eaves and refreezes into a thick barrier of ice.
Here is the quick, proven formula to help manage this cycle and reduce the risk of ice dams forming on your home:
- Seal Air Leaks First: Stop warm, moist air from escaping your living spaces into the attic through bypasses like light fixtures, wire holes, and attic hatches.
- Upgrade Insulation: Keep your attic floor heavily insulated, ideally to R-60 or greater in Wisconsin, to block heat from rising through conduction.
- Create Balanced Ventilation: Maintain a continuous flow of cold outdoor air from your soffit (intake) vents to your ridge (exhaust) vents to keep the underside of your roof deck cold.
- Aim for the 1:150 Ratio: Ensure you have at least 1 square foot of net free ventilation area for every 150 square feet of attic floor space.
As the founder of A-RITE Exteriors, I have spent over two decades helping Central Wisconsin homeowners solve complex problems involving attic ventilation and ice dams. My team and I build integrated exterior systems that keep your living spaces comfortable while keeping your roof deck cold enough to help reduce the risk of ice dams.
Attic ventilation and ice dams word roundup:
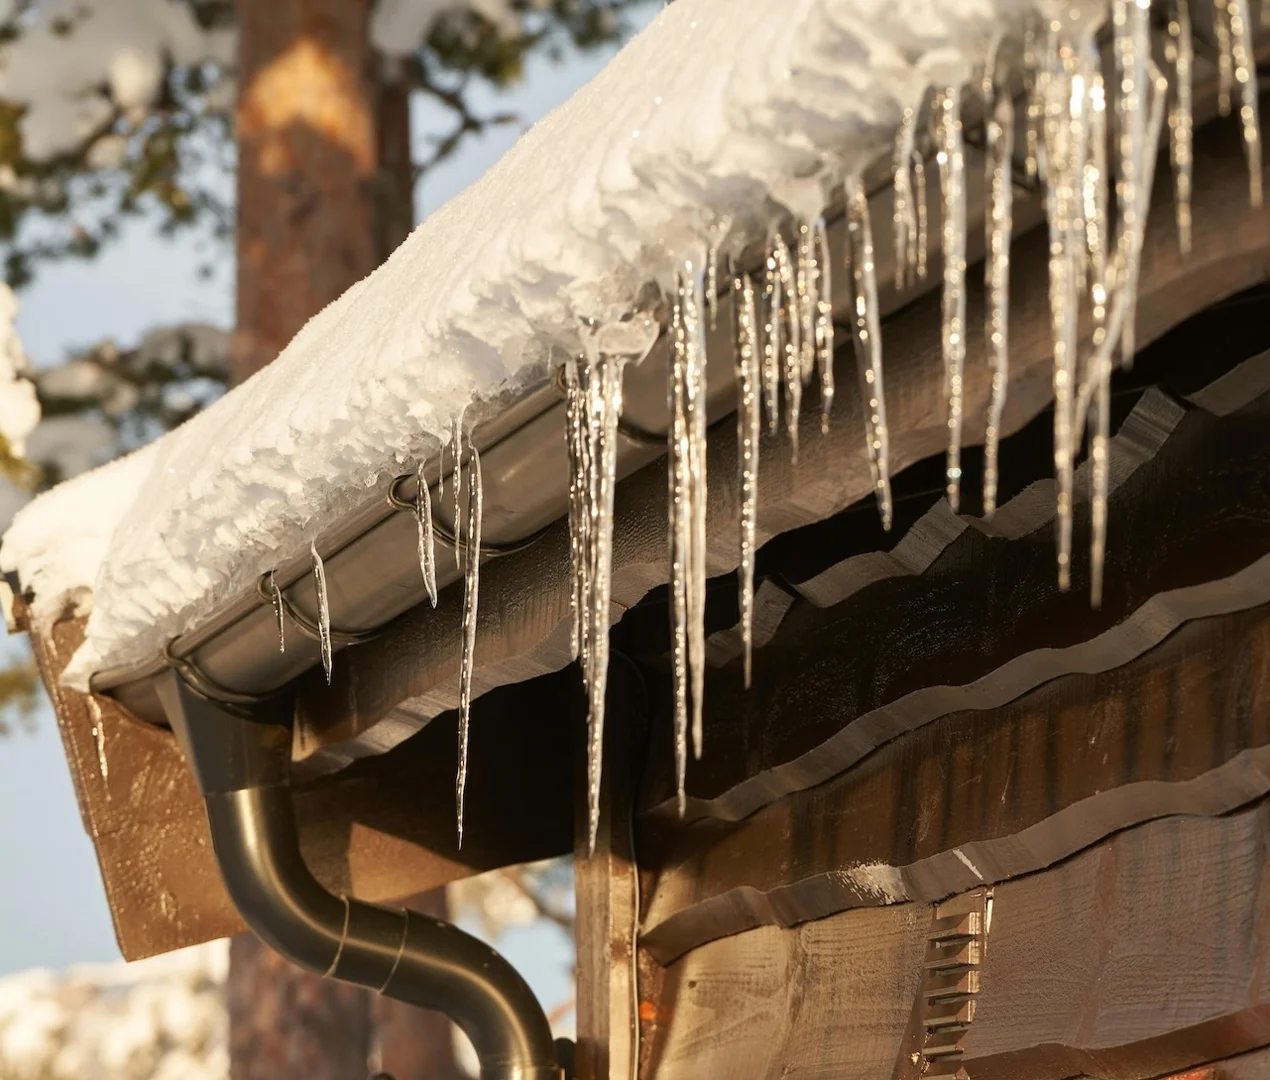
To effectively address ice dams, we must first understand what they are and why they are so prevalent during our harsh Central Wisconsin winters. An ice dam is a thick ridge of solid ice that builds up along the eaves and gutters of a home. This ice acts as a structural barrier, blocking melting snow from draining off the roof as it naturally should.
In Wisconsin Rapids, Wausau, and surrounding areas, we experience substantial snow accumulation alongside prolonged periods of freezing weather. When snow sits on a roof, it does not just look pretty; it actually acts as a thermal blanket, trapping heat underneath it. If the roof deck below that snow rises above the critical 32°F threshold, the bottom layer of snow begins to melt.
As the meltwater flows down the slope of the roof, it eventually reaches the eave or overhang. Because the eave extends past the heated exterior walls of your living space, its temperature remains below 32°F. The runoff instantly refreezes, forming a ridge of ice. Over several days of freezing and thawing, this ridge grows taller, trapping a pool of liquid water behind it.
This trapped water has nowhere to go but up. Through capillary action, the water backs up under the shingles, bypassing the roof’s natural shedding mechanism. Once water gets past your shingles, it can cause structural issues, but addressing these concerns early can help reduce the risk of secondary water damage.
To understand the full scope of what this moisture can do to your property, explore the 9 Common Types of Damage Caused by Ice Dams. Additionally, if you are wondering why your property seems to struggle more than others on your block, you can read about Why Some Homes Are More Prone to Ice Dams Than Others.
The Physics of Ice Dam Formation
The thermodynamic cycle of an ice dam relies on three simultaneous conditions: snow cover on the roof, heat escaping from the home into the attic space, and sub-freezing outdoor temperatures (typically in the low 20s°F).
According to the building science experts at the Dealing with and preventing ice dams | UMN Extension guide, heat transfers from your warm living space into the unheated attic through three distinct methods:
- Conduction: Direct heat transfer through building materials like drywall, ceiling joists, and inadequate insulation.
- Convection: Warm air physically escaping through unsealed gaps, cracks, and bypasses in your ceiling.
- Radiation: Electromagnetic heat waves radiating from warm surfaces (like ceiling drywall) to the colder roof deck.
Convection (air leakage) is often the largest contributor. When warm, humid indoor air rises into the attic, it quickly warms the underside of the roof sheathing. As the snow melts and runs down to the cold eave, it refreezes, starting the destructive cycle.
Why Ice Dams Are More Than Just a Gutter Problem
Many homeowners mistakenly believe that clogged or frozen gutters are the root cause of ice dams. While frozen gutters can certainly collect ice and make the symptoms look worse, they are not the primary culprit. Even if you completely removed your gutters, ice dams would still form on the cold edge of your roof deck.
The real issue is the temperature differential across your roof surface. If the upper portions of your roof are warm (above 32°F) while the lower edges are cold (below 32°F), an ice dam is inevitable. When water pools behind the ice, it easily penetrates asphalt shingles, which are designed to shed water downward, not to hold standing pools of water.
This is also why materials matter. Homeowners often ask if metal roofs are immune. You can learn more about this in our article Should You Worry About Ice Dams on a Metal Roof. While metal sheds snow more easily, poor attic ventilation can still cause ice dams in valleys and eaves on metal systems.
The Critical Link Between Attic Ventilation and Ice Dams
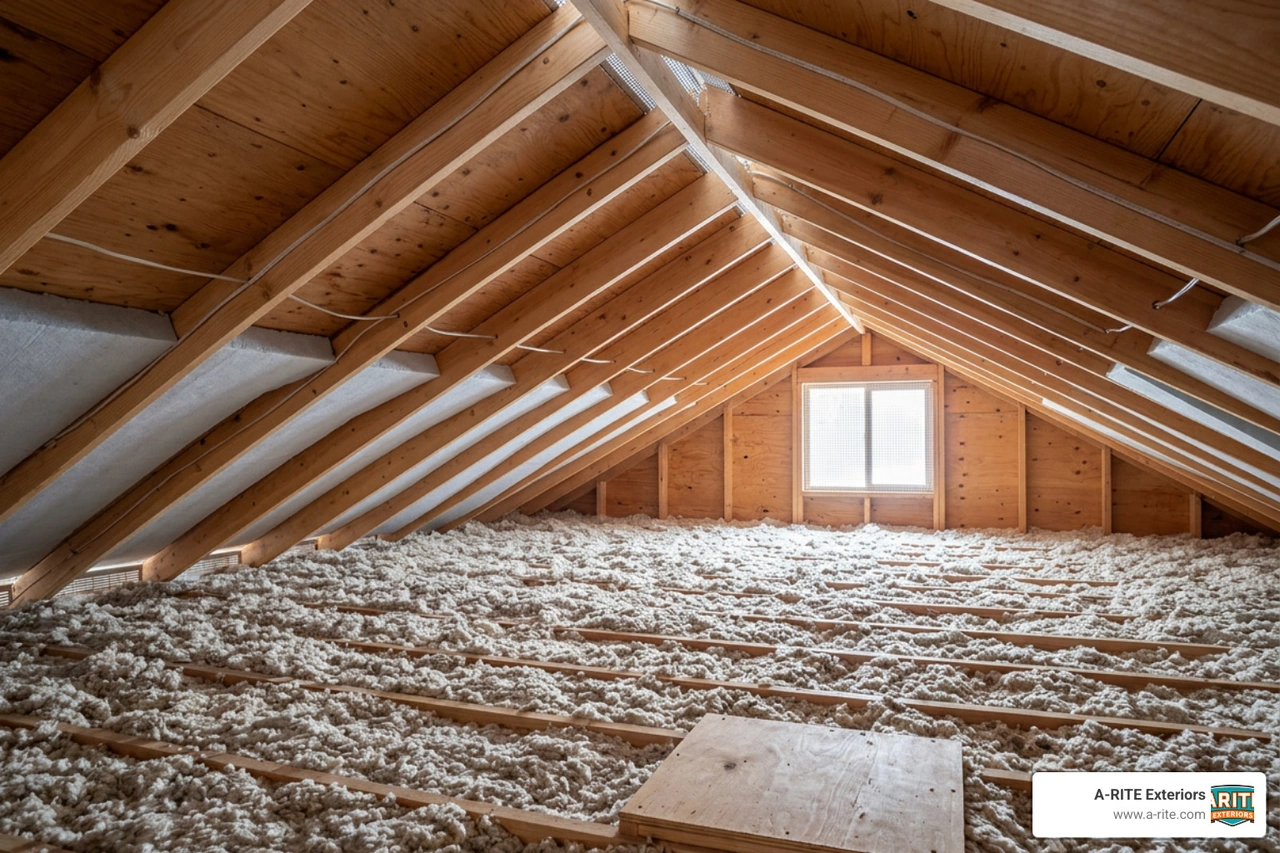
Now that we understand the thermodynamics of ice dams, we can address the primary defense: attic ventilation. The fundamental goal of attic ventilation in cold climates is to keep the roof deck cold. By constantly flushing out any escaping heat, we keep the roof sheathing close to the outdoor temperature, helping reduce the melting of snow.
This process relies heavily on the "stack effect" (gravity-driven ventilation). Because warm air is less dense than cold air, it naturally rises. In a properly ventilated attic, cold air is drawn in through the lower intake vents, flows upward along the underside of the roof deck, and escapes through the exhaust vents at the ridge.
According to the About Attic Ventilation | ENERGY STAR guidelines, a balanced system is key to maintaining this airflow and helping reduce moisture accumulation.
How Poor Attic Ventilation and Ice Dams Are Connected
If your attic lacks proper ventilation, heat escaping from your home becomes trapped at the peak of your roof. This trapped heat warms the roof deck, melting the snow load from underneath. The water then flows down to the uninsulated eave overhang, where the cold outdoor air instantly freezes it.
By introducing a continuous stream of cold outdoor air along the underside of the roof deck, we equalize the roof temperature. When the roof deck remains below freezing, the snow on top melts naturally from the sun and outdoor temperature fluctuations, rather than from escaping home heat. This helps reduce localized melting and the freeze-thaw cycle at the eaves.
To learn how to spot these issues early in the season, see our guide on Spotting Early Signs of Ice Dams Before They Get Worse.
Warning Signs of Inadequate Attic Ventilation
You do not have to wait for a major ceiling leak to know your ventilation is failing. Keep an eye out for these common warning signs during the winter months:
- Massive Icicles: While small, decorative icicles can happen, thick, heavy icicles hanging from your gutters or siding are a clear sign of active ice damming.
- Attic Condensation and Frost: When warm, moist air gets trapped in a cold attic, it condenses on the underside of the roof deck. During extreme cold, this condensation freezes into frost, creating a "frost forest" on your roof sheathing.
- Rusted Fasteners: If you notice rusted nails or metal connectors in your attic, it indicates chronic high humidity and poor ventilation.
- Mold and Mildew: Dark staining on your roof sheathing or rafters is a warning sign that trapped moisture is encouraging mold growth, which compromises your indoor air quality.
Sizing Your System: Ventilation Ratios and Guidelines
Sizing your ventilation system correctly is critical. The general building code standard for attic ventilation is the 1:300 rule (1 square foot of net free ventilating area for every 300 square feet of attic floor space). However, cold-regions research shows that this standard is often insufficient for ice dam prevention.
According to the comprehensive military-grade research published in MP-02-5778, Guidelines for Ventilating Attics and Cathedral Ceilings to Avoid Icings at Their Eaves, helping reduce the risk of ice dams in heavy snow regions requires up to double the standard ventilation area. We recommend aiming for a 1:150 ratio (1 square foot of net free ventilation per 150 square feet of attic floor).
Furthermore, the research indicates that ventilation systems should be sized to keep the underside of the roof deck below freezing when the outside design temperature is 22°F (-5.6°C). This ensures that even during typical winter thaws and freezes, your roof remains cold enough to help reduce the risk of problematic icings.
Key Components of a Properly Ventilated and Insulated Attic
A high-performing attic requires three elements working in perfect harmony: intake ventilation, exhaust ventilation, and a robust thermal barrier (insulation). If any of these components are missing or improperly installed, the system will fail.
As a trusted Attic Insulation Contractor Central Wisconsin, we specialize in designing and installing balanced systems that withstand our harsh local climate.
Intake and Exhaust: The Pillars of Balanced Attic Ventilation
A balanced ventilation system must have equal amounts of intake and exhaust ventilation. If you have plenty of ridge vents (exhaust) but your soffit vents (intake) are blocked by insulation, your attic will depressurize. This negative pressure can actually pull warm air out of your living space, increasing your heating costs and ice dam risks.
To prevent this, we install continuous soffit vents along the eaves to introduce fresh, cold air. We then install continuous ridge vents along the peak of the roof to let the warm air escape. To keep the intake path clear, we install attic ventilation baffles (or wind washing guards) at every single rafter bay. These baffles maintain a minimum 2-inch unobstructed air space between the top of the insulation and the underside of the roof sheathing, which is significantly more effective than the 1-inch minimum required by some building codes.
How Attic Insulation and Attic Ventilation and Ice Dams Prevention Work Together
While ventilation keeps your roof deck cold, insulation keeps your living spaces warm. They must work together to help reduce the risk of ice dams. If you have great ventilation but poor insulation, too much heat will escape into the attic, overwhelming your ventilation system. Conversely, if you have thick insulation but no ventilation, the minor heat that does escape will accumulate and warm the roof deck.
In Central Wisconsin, the recommended R-value for attic insulation is R-60 or greater. This high level of thermal resistance blocks heat transfer via conduction. To understand how this works, read our detailed guides on What R-Value Means and Why It's Important for Insulation and What Is R-Factor Insulation.
If you are wondering what your specific home needs, check out our resource on What R-Value Insulation Do I Need for Attic.
Sealing the Bypasses: Stopping Attic Air Leaks
Many homeowners believe that adding more insulation is the ultimate fix for ice dams. However, if you do not seal air leaks (bypasses) first, adding insulation can actually worsen the problem by trapping rising warm air beneath it.
According to the Attic Air Sealing, Insulating, and Ventilating for Ice Dam Prevention | Building America Solution Center guide, air leaks (convection) transfer far more heat into an attic than simple conduction through insulation. Common attic bypasses include:
- Recessed Can Lights: Older, non-IC-rated fixtures act like little chimneys, venting heat directly into the attic. They must be replaced with sealed, insulation-contact (IC) rated LED fixtures.
- Plumbing Stacks and Wire Penetrations: Gaps around pipes and electrical wires running through your top plates allow significant air leakage.
- Chimney Flashings: The gap between your chimney and framing must be sealed with steel flashing and fire-rated sealant.
- Attic Access Hatches: Uninsulated, unsealed attic doors are major sources of heat loss.
We use professional-grade expandable foam and fire-rated sealants to seal these bypasses before installing fiberglass insulation.
Vented vs. Unvented Attic Designs for Cold Climates
When designing or retrofitting a roof assembly, building science allows for two primary approaches: vented or unvented attics. The choice depends on your home’s architectural design, budget, and structural constraints.
According to the building science research in Understanding Attic Ventilation, both assemblies can perform exceptionally well in cold climates if executed correctly.
| Feature | Vented Attic Assembly | Unvented Attic Assembly |
|---|---|---|
| Thermal Boundary | Located at the attic floor (ceiling drywall) | Located at the roof deck rafters |
| Attic Temperature | Cold (matches outdoor temperature) | Warm (matches indoor temperature) |
| Primary Insulation | Blown-in fiberglass or insulation on attic floor | Spray foam or rigid insulation under/above roof deck |
| Air Sealing | Critical at the ceiling plane (bypasses) | Critical at the roof deck seams |
| HVAC Ductwork | Highly discouraged in this space | Safe to locate in this conditioned space |
| Cost-Effectiveness | Highly cost-effective for standard roofs | Higher initial material and labor costs |
Vented Attics: The Traditional Cold-Climate Standard
The vented, unconditioned attic is the simplest, most reliable, and most cost-effective design for helping reduce the risk of ice dams in standard residential structures. By keeping the attic space completely isolated from the conditioned living spaces below, we ensure the roof deck remains cold.
This design requires a continuous, airtight ceiling air barrier and a high-performance vapor retarder (such as a Class II vapor retarder in Climate Zone 6) to prevent indoor moisture from migrating into the attic.
Unvented and Hybrid Roof Assemblies
For homes with complex rooflines, vaulted ceilings, or attic-located HVAC systems, a traditional vented attic may not be practical. In these cases, an unvented compact roof design is preferred. This approach uses air-impermeable spray foam applied directly to the underside of the roof deck, moving the thermal and pressure boundaries to the roofline.
However, in extreme snow regions (where ground snow loads exceed 60 lb/ft²), even an unvented roof can suffer from ice dams because the thick snow blanket traps minor heat.
As outlined in Construct Roofs and Attics for Ice Dam Prevention | Building America Solution Center, the ultimate solution for these extreme conditions is a vented over-roof. This hybrid design features an unvented insulated roof deck, topped with a secondary layer of framing (battens) and a second roof deck, creating a ventilated air space directly beneath the shingles to flush away any residual heat.
Safe Ice Dam Removal and Long-Term Prevention Strategies
If you already have an active ice dam causing water to back up into your home, you need immediate relief. It is crucial to understand the difference between temporary emergency mitigation and permanent, long-term solutions.
To explore the advantages and safety risks of various removal methods, read our comparison on DIY vs Professional Ice Dam Removal Pros and Cons.
Safe and Effective Methods for Removing Existing Ice Dams
When dealing with an active leak, never climb onto an icy roof, and never use hammers, chisels, axes, or chainsaws to break up the ice. These physical methods can easily shatter your shingles, puncture your underlayment, and void your roof warranty.
If you require professional intervention, we provide safe, specialized Ice Dam Removal services using low-pressure steam. Steaming melts the ice safely and quickly without causing mechanical damage to your roof.
For emergency DIY drainage, you can use a long-handled roof rake from the safety of the ground to clear the fresh snow above the dam, or fill a nylon stocking with calcium chloride (never rock salt, which corrodes metal gutters and kills landscaping) and lay it vertically across the dam to melt a safe drainage channel.
If your shingles have already suffered damage from ice or physical removal attempts, you may need targeted Repairs to restore your roof's water resistance.
Long-Term Prevention: Upgrades, Rebates, and Financing
To permanently solve your ice dam issues, we recommend upgrading your attic’s insulation and ventilation systems. We make this process as seamless and affordable as possible:
- Focus on Energy Rebates: Homeowners may qualify for Focus on Energy rebates. These rebates are for qualifying insulation and air-sealing work (such as attic insulation, air sealing, wall insulation, foundation insulation, duct sealing, and qualifying DIY attic insulation and air sealing), not for roof replacement itself. Rebate amounts and eligibility rules change over time, and homeowners should confirm current program rules before starting work.
- Tax Credits: The Section 25C Energy Efficient Home Improvement Credit has historically provided tax credits for qualifying energy-efficiency improvements. For current tax years, always consult a tax professional to see what federal credits may apply to your insulation upgrades, as these programs are subject to change and are not guaranteed for 2026.
- Financing: Financing options are available for qualifying homeowners. Loan amounts up to $100,000 unsecured may be available, with final approval, rates, and terms based on lender review and credit qualification.
If your roof system has reached the end of its useful lifespan due to chronic ice dam damage, we also provide complete, high-performance Roofing replacement services designed for Wisconsin winters.
Frequently Asked Questions about Attic Ventilation and Ice Dams
How much snow is needed on a roof for an ice dam to form?
An ice dam can form with as little as 2 inches of snow accumulation on a roof. Snow has an insulating value of approximately R-1 to R-2 per inch. As the snow depth increases, it traps more escaping attic heat against the roof deck, accelerating the melting process even when outdoor temperatures are well below freezing.
Can I help reduce the risk of ice dams by just adding more insulation?
No. Simply adding more insulation without sealing attic bypasses can actually worsen ice damming. Warm air will continue to leak through the bypasses, bypass the insulation, and warm your roof deck. You must perform comprehensive air sealing first, upgrade your insulation to R-60, and ensure you have a balanced intake and exhaust ventilation system.
Is mechanical attic ventilation recommended for cold climates?
No, motorized or mechanical attic ventilators are generally not recommended for cold-climate ice dam prevention. These fans can depressurize your attic space, drawing warm, moist air out of your living spaces through unsealed bypasses. This can affect your heating bills and can introduce excess moisture into the attic, leading to severe condensation and mold issues. Natural, gravity-driven (passive) ventilation is the safest and most effective approach.
Conclusion
Helping reduce the risk of ice dams in Central Wisconsin requires a comprehensive, science-backed approach that addresses the entire attic system. By combining professional air sealing, high-R-value Insulation, and a balanced intake and exhaust ventilation system, you can keep your roof deck cold, protect your home from costly water damage, and assist in helping lower your heating bills.
At A-RITE Exteriors, we build weather-resistant solutions designed to withstand the harshest Wisconsin winters. Whether you live in Wisconsin Rapids, Wausau, Stevens Point, or Green Bay, our team is here to help you protect your home. Trust the Hawk on Your Block, contact us today to schedule your professional attic assessment!